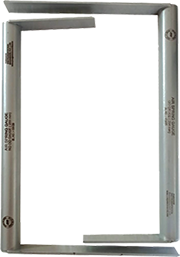
‘PIE’ make Set of two Air Spring Height Measuring Gauges (GO & NO GO), generally & functionally as per Drawing no. SK/GAUGE – 1/2021. The gauge is made from hard steel/hardened stainless steel and each gauge is supplied in a wooden box. Each set consist of one GO-Gauge and one NO-GO Gauge
Height Measuring Gauges
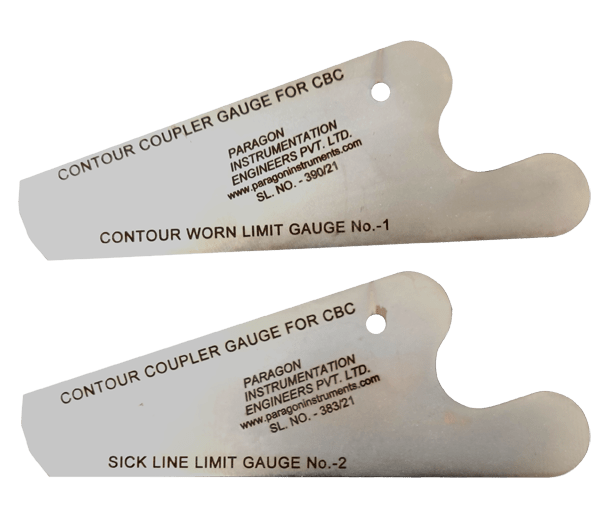
Coupler Contour Gauge
‘PIE’ Brand Coupler Contour Gauge Set of two gauges for contour worn Limit gauge No. – 1 and gauge No. – 2 of G–80 manual for CBC made of hard alloy steel used for inspection of coupler body (Knuckle and guard arm) useful for reconditioning and repairing of Coupler.
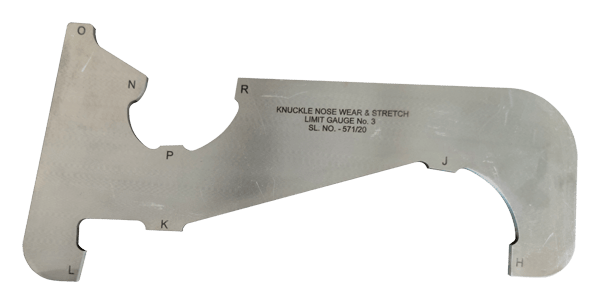
Knuckle Stretch and Nose Wear Gauge
‘PIE’ Brand Knuckle Stretch and Nose Wear Gauge made of 5 mm thick, Carbon Steel alloy plate Hardness 40-50 HRC for inspection of Knuckle And Wear at nose of knuckles gauge No. – 3 for CBC of BTCS wagons.
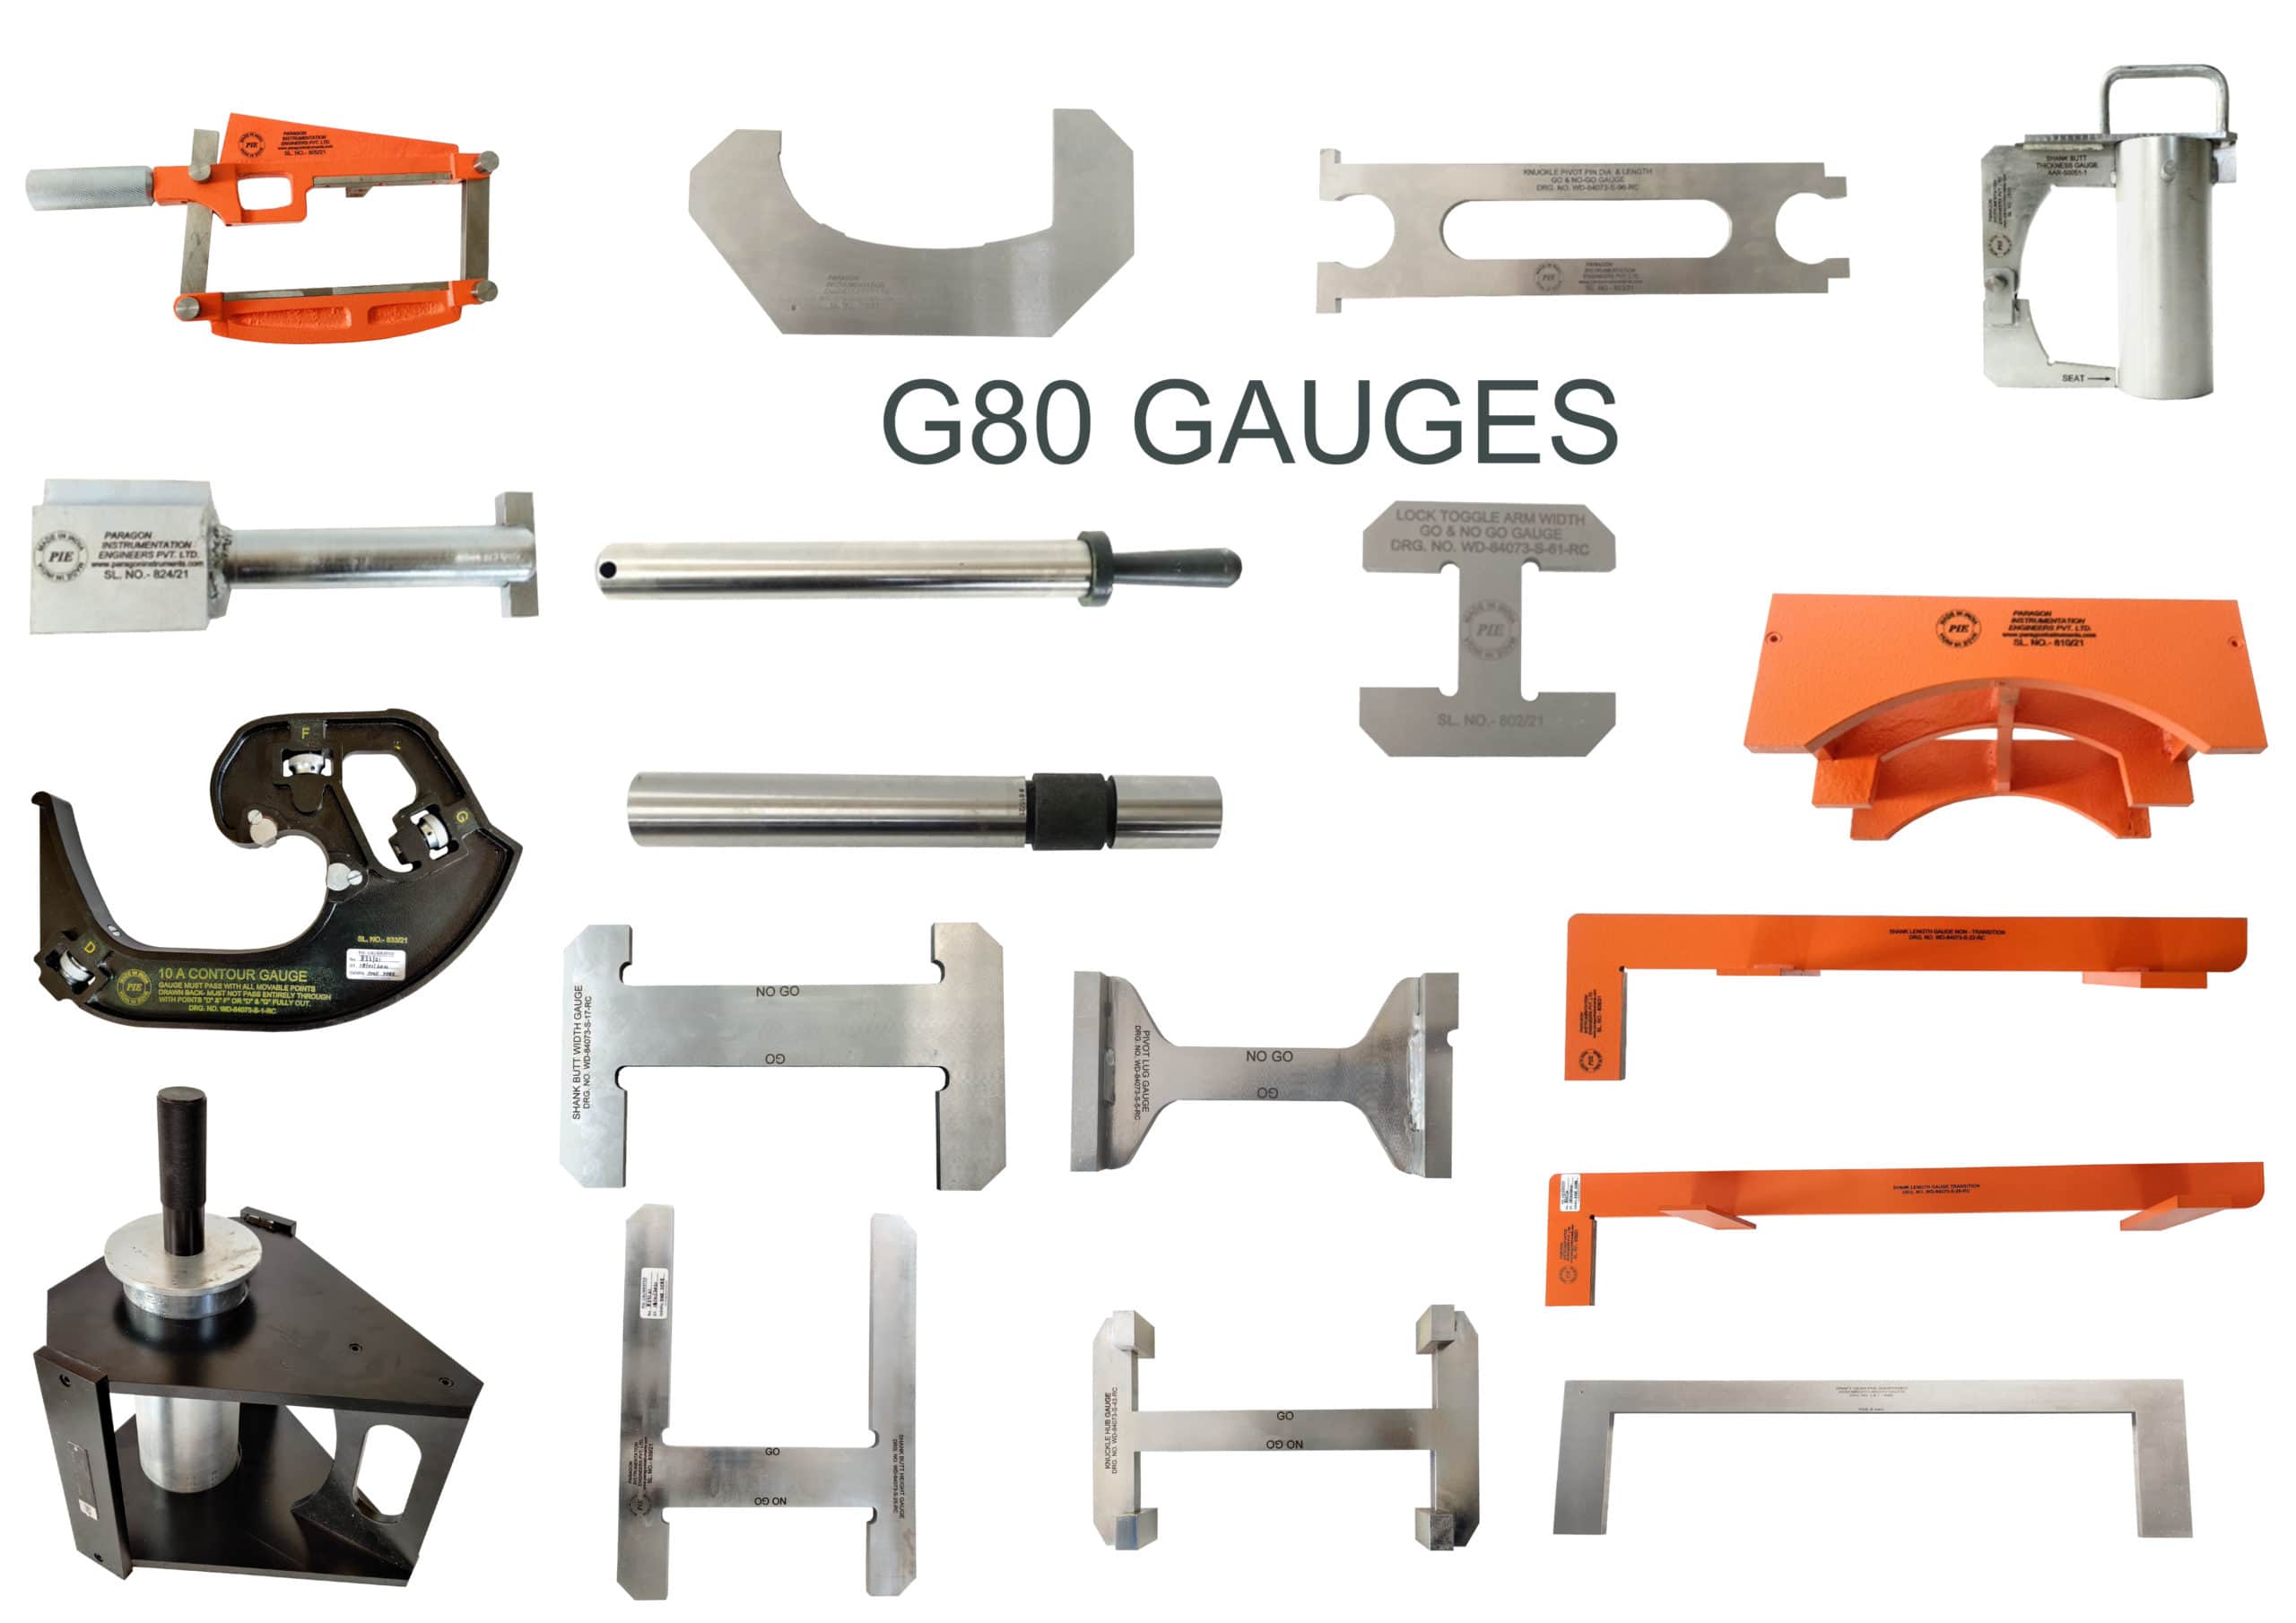
CBC GAUGES AS PER G-80 MANUAL
| Sl. | Description |
| 1 | ‘PIE’ make 10A Contour Gauge for Coupler Inspection as per RDSO Drawing No. WD–84073 –S–1–RC. |
| 2 | ‘PIE’ make Bottom Anticreep Horizontal as per RDSO Drawing No. WD-84073-S-3-RC. |
| 3 | ‘PIE’ make Top Anti Creep Vertical Location Gauge generally as per RDSO Drawing No. WD-84073-S/4 RC, ALT.4. |
| 4 | ‘PIE’ make Pivot Lug Gauge RDSO Drawing no. WD-84073-S-5 RC. |
| 5 | ‘PIE’ make Pin Protector Gauge as per RDSO Drawing no. WD-84073-S-6 RC. |
| 6 | ‘PIE’ make Pivot Pin Gauge as per RDSO Drawing No. WD-84073-S-8-RC. |
| 7 | ‘PIE’ make Rotary Lug gauge as per RDSO Drawing No. WD-84073-S-11-RC. |
| 8 | ‘PIE’ make Shank Butt Width Gauge as per RDSO Drawing No. WD-84073-S-17-RC. |
| 9 | ‘PIE’ make Shank Height with Wear Plate Gauge as per RDSO Drawing No. WD-84073-S-21-RC. |
| 10 | ‘PIE’ make Shank Length (Non-Transition) as per Drawing No. WD-84073-S-22-RC. |
| 11 | ‘PIE’ make Shank Butt End Contour Gauge as per RDSO Drawing No. WD-84073-S-23-RC. |
| 12 | ‘PIE’ make Spherical Butt & Pin Hole Gauge as per RDSO Drawing No. WD-84073-S-24-RC. |
| 13 | ‘PIE’ make Shank Butt Height Gauge as per RDSO Drawing No. WD-84073-S-25-RC. |
| 14 | ‘PIE’ make Shank Length Gauge Transition as per RDSO Drawing No. WD-84073-S-26-RC. |
| 15 | ‘PIE’ make Knuckle Bottom Pulling Lug Gauge as per RDSO Drawing No. WD-84073-S-41-RC. |
| 16 | ‘PIE’ make Knuckle Movable Point Gauge as per RDSO Drawing No. WD-84073-S-42-RC. |
| 17 | ‘PIE’ make Knuckle Hub Gauge as per RDSO Drawing No. WD-84073-S-43-RC. |
| 18 | ‘PIE’ make Knuckle Tail Shelf Gauge as per RDSO Drawing No. WD-84073-S-46-RC. |
| 19 | ‘PIE’ make Knuckle Pin Hole Gauge as per RDSO Drawing No. WD-84073-S-47-RC. |
| 20 | ‘PIE’ make Knuckle Length Gauge as per RDSO Drawing No. WD-84073-S-48-RC. |
| 21 | ‘PIE’ make Knuckle Contour Gauge Guard Arm Side as per RDSO Drawing No. WD-84073-S-56-RC. |
| 22 | ‘PIE’ make Lock Parallel and Thickness Gauge as per Drawing No. WD-84073-S-59-RC. |
| 23 | ‘PIE’ make Lock Slot Gauge as per RDSO Drawing No. WD-84073-S-60-RC. |
| 24 | ‘PIE’ make Lock Toggle Arm Width Go & No Go Gauge as per RDSO Drawing No. WD-84073-S-61-RC. |
| 25 | ‘PIE’ make Draft Gear Follower Profile Gauge as per RDSO Drawing No. WD-84073-S-71-RC. |
| 26 | ‘PIE’ make Lock Lift Assembly Gauge as per RDSO Drawing No. WD-84073-S-76-RC. |
| 27 | ‘PIE’ make Knuckle Pivot Pin Dia & Length GO & GO-NO Gauge per RDSO Drawing No. WD-84073-S-96-RC. |
| 28 | ‘PIE’ make Contour Worn Limit Gauge No. 01 as per G-80 manual CBC Gauge no.-1. |
| 29 | ‘PIE’ make Contour Worn Limit Gauge No. 02 as per G-80 manual CBC Gauge no.-2. |
| 30 | ‘PIE’ Brand Knuckle Stretch and Nose Wear Gauge made of 5 mm thick, Carbon Steel alloy plate Hardness 40-50 HRC for inspection of Knuckle And Wear at nose of knuckles Gauge No. – 3 for CBC of BTCS wagons. |
| 31 | ‘PIE’ make Knuckle Lock Engagement Surface Gauge as per G-80 manual CBC Gauge No. 9. |
| 32 | ‘PIE’ make Knuckle Top Pulling Lug Gauge as per G-80 manual CBC Gauge No. 10. |
| 33 | ‘PIE’ make Knuckle Bottom Pulling Gauge as per G-80 manual CBC Gauge No. 11. |
| 34 | ‘PIE’ make Pin Protector Controlled Gauge as per G-80 manual CBC Gauge No. 12. |
| 35 | ‘PIE’ make Draft Gear Pre Shortened Assembled Length Gauge as per drawing no. J & T – 3064. |
| 36 | ‘PIE’ make Guard Arm Distortion Gauge generally as per RDSO G-80 technical manual. |
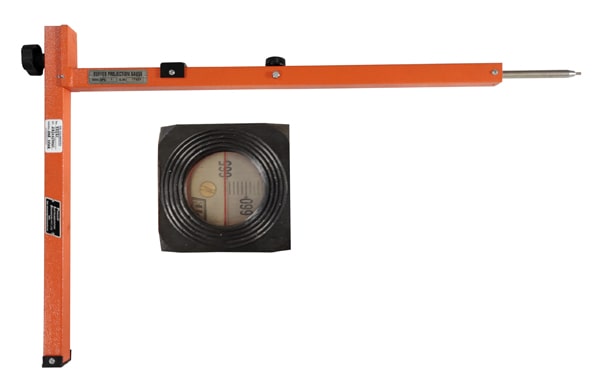
BUFFER PROJECTION GAUGE MODEL BPG-1
‘PIE’ Brand Buffer Projection Gauge, Model BPG-1 the gauge gives automatically the projection of buffers within ±1.0 mm accuracy, Range – 570 mm to 665 mm Supplied in elegantly finished well padded wooden storing and transportation box.
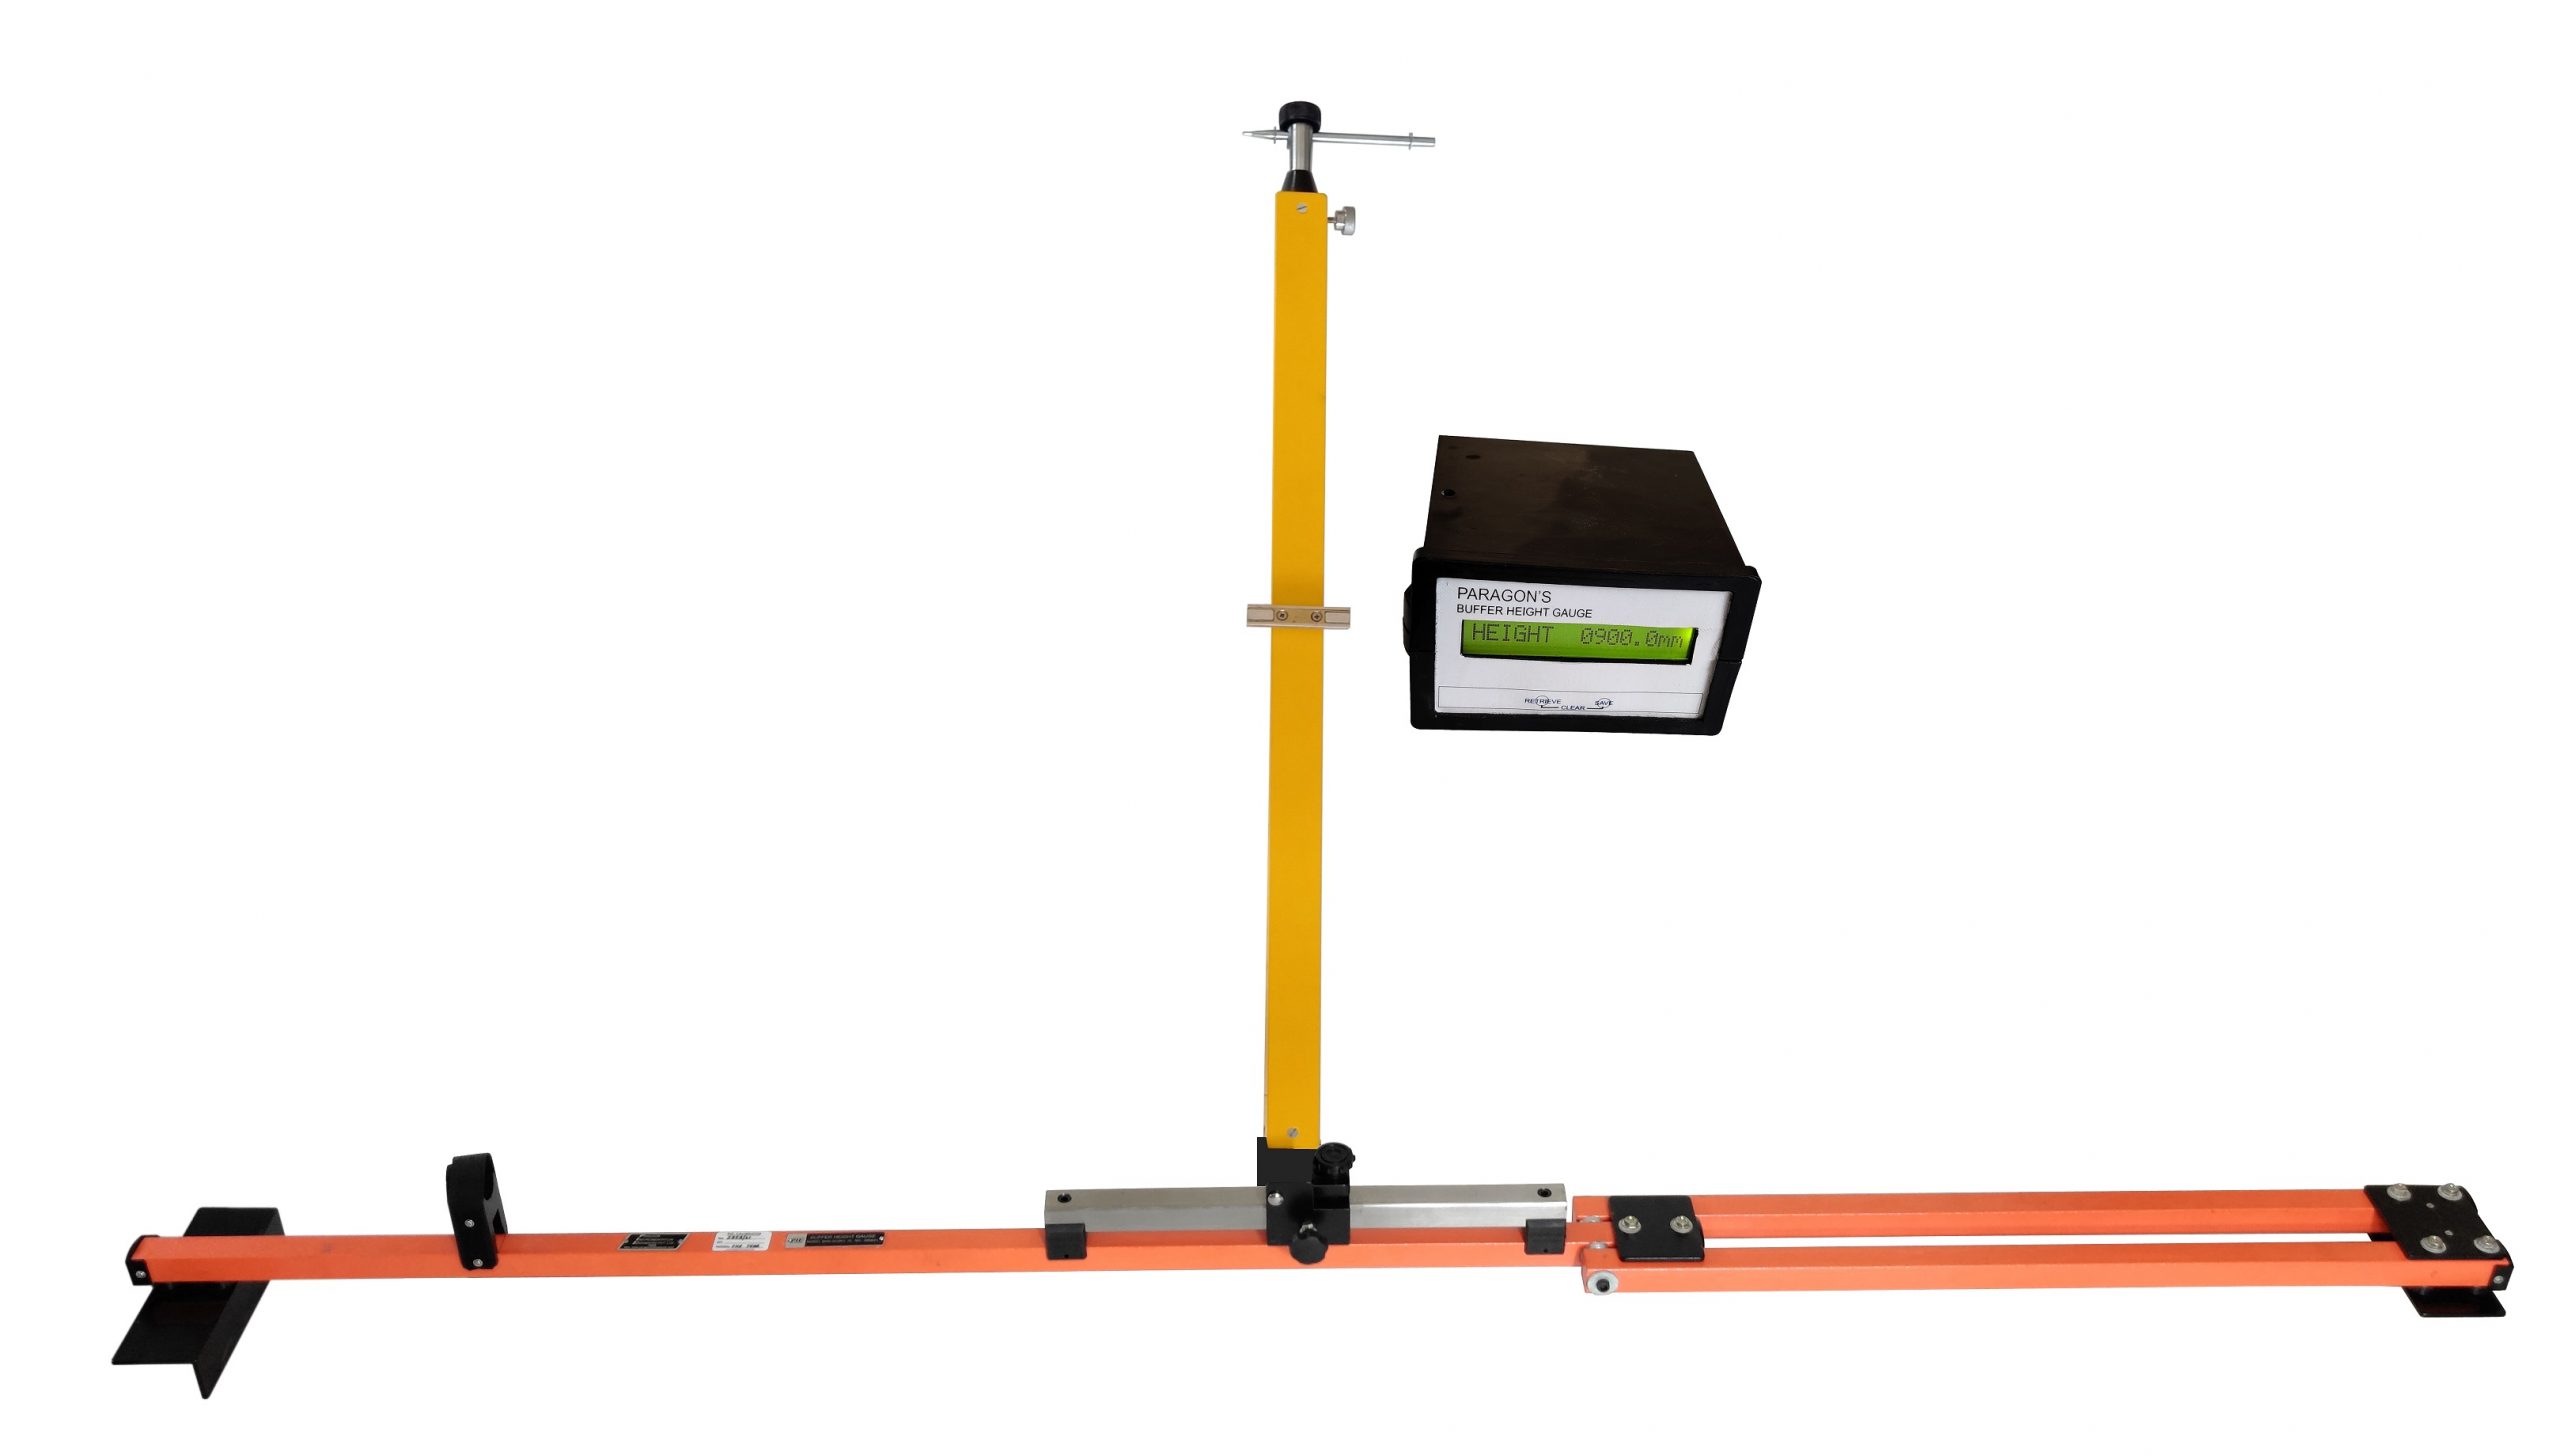
BUFFER HEIGHT GAUGE MODEL BHG-3 (CBC) – E
‘PIE’ brand Digital Buffer Height Gauge, Model BHG-3 (CBC) – E the gauge consists of a foldable track base and a vertical column fitted with a pointer. This column has a verticality bubble and is foldable for compactness.
Special Features: –
- Height readings are displayed on a Digital display
- Accuracy of gauge is ± 0.2mm
- Measuring range 930 to 1130mm
- Supplied in elegantly finished carrying case/bag.
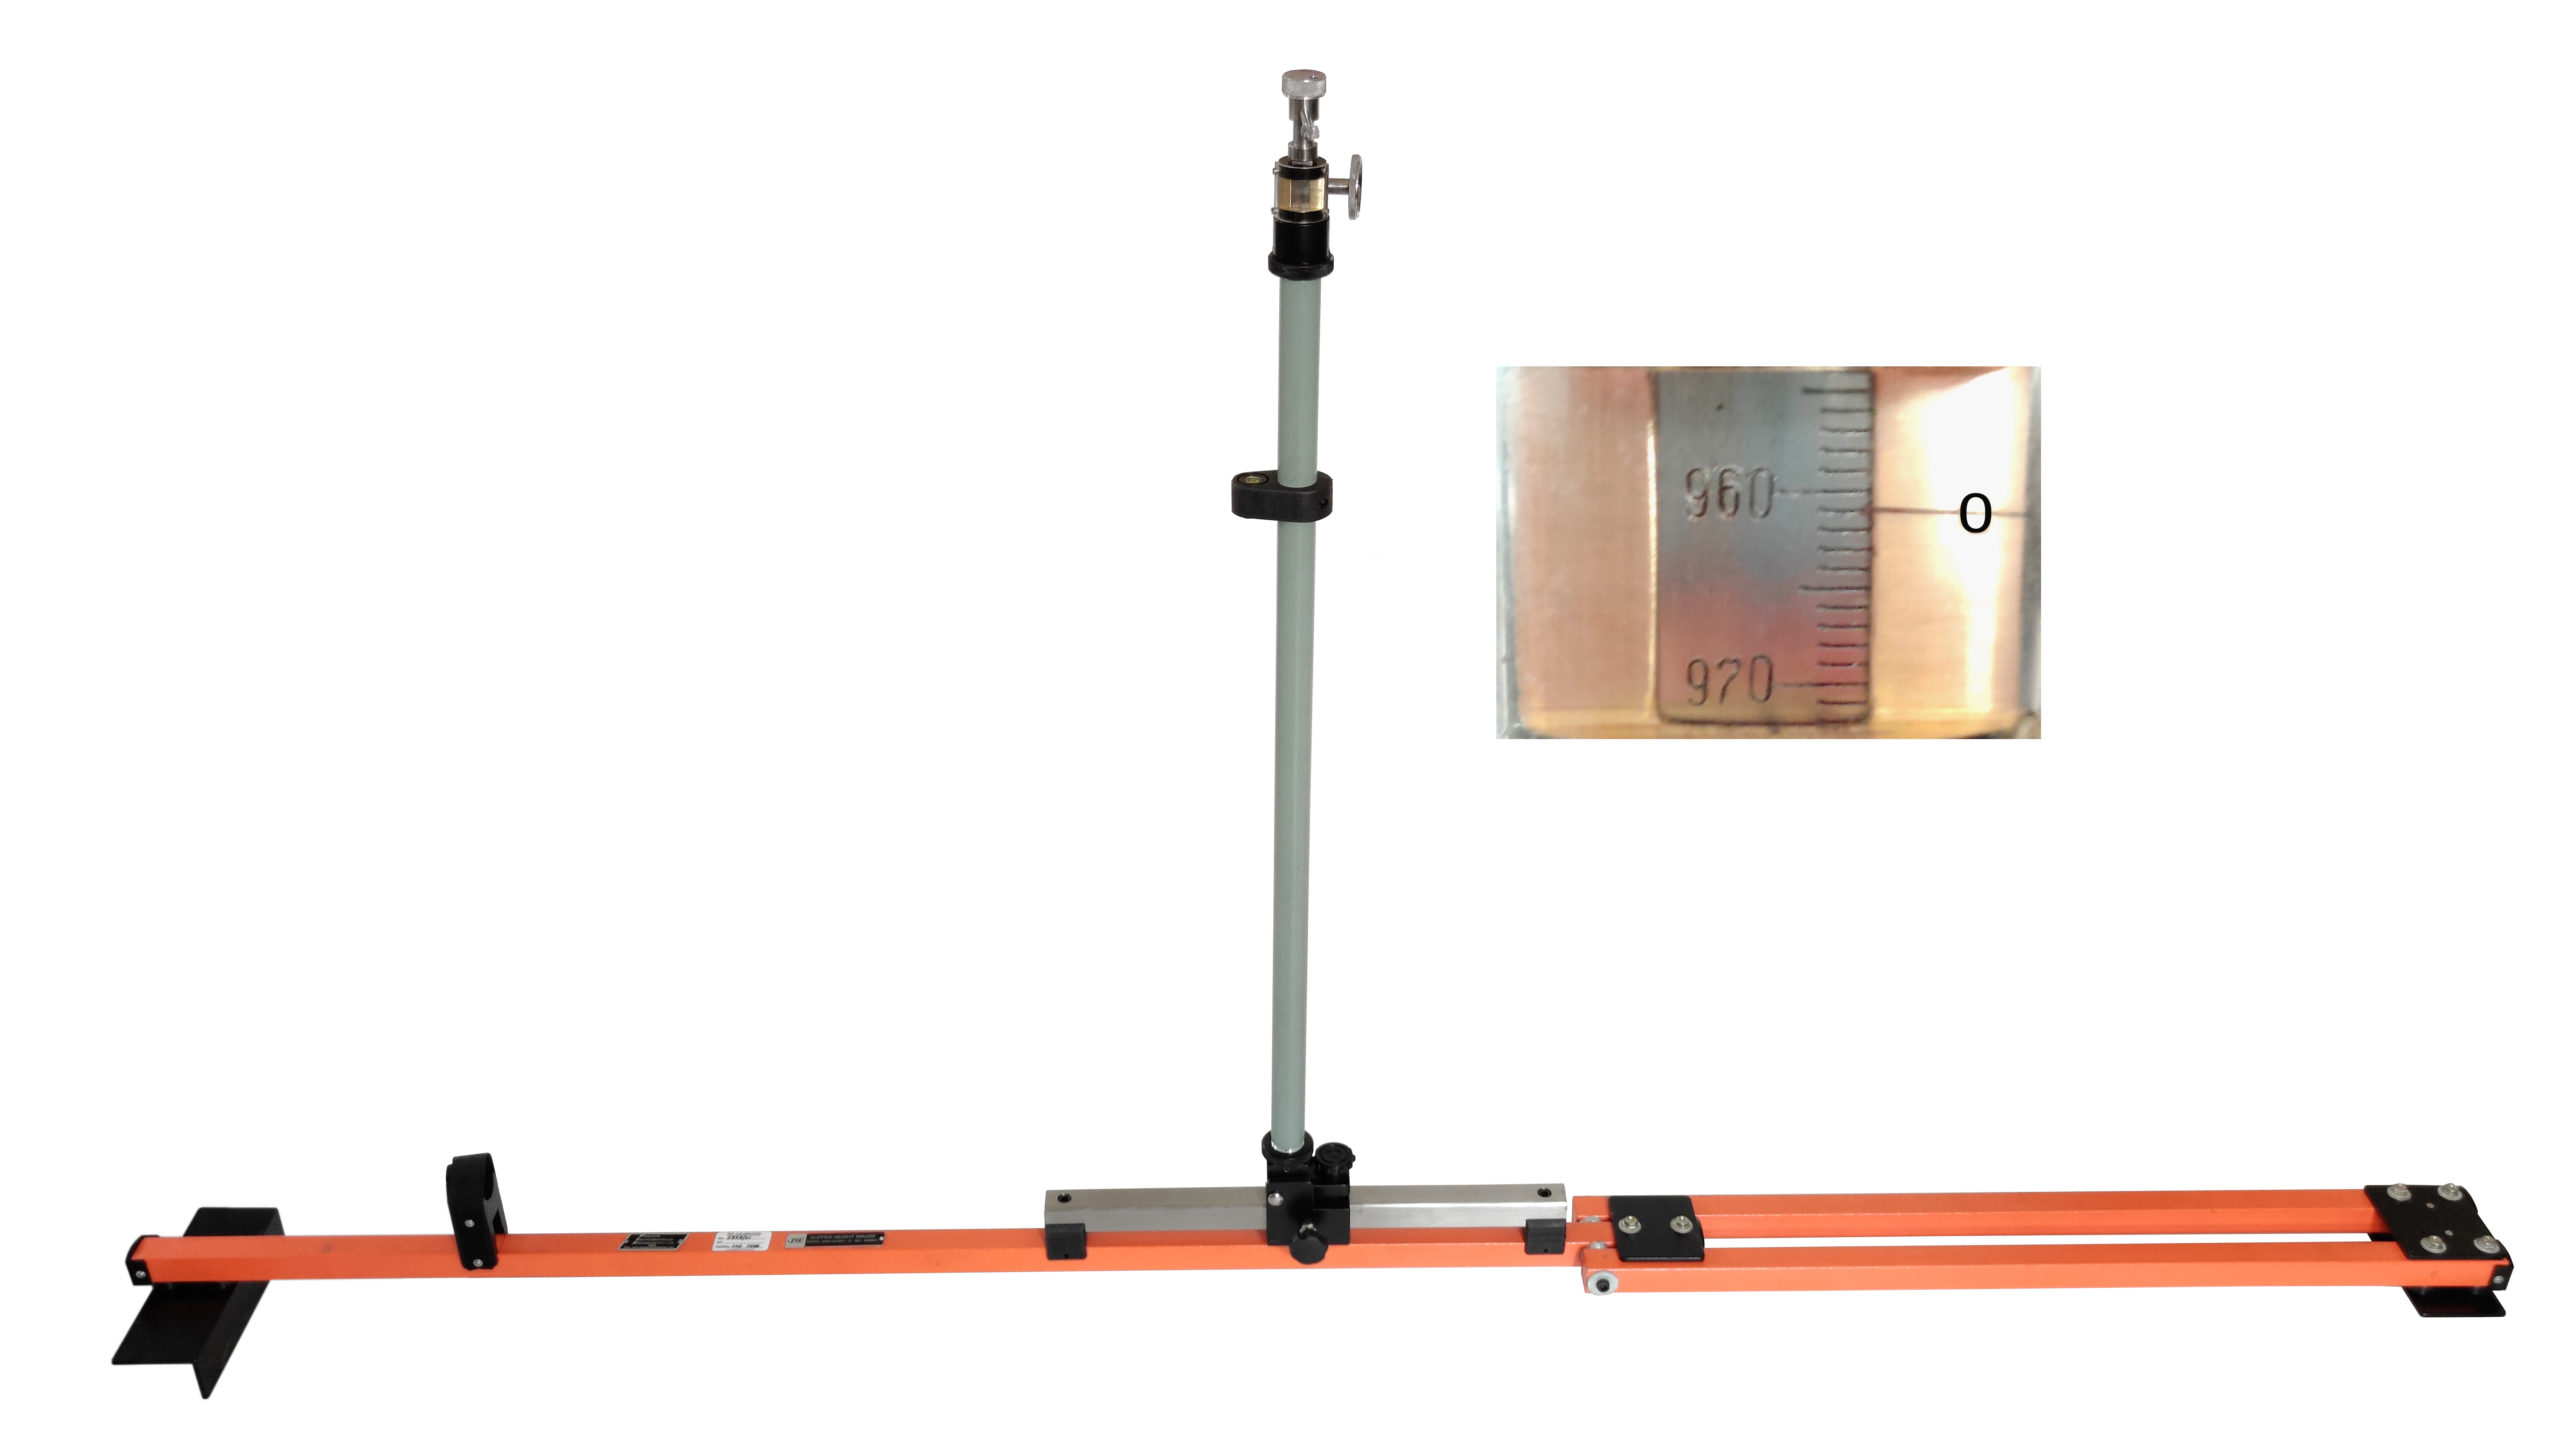
BUFFER HEIGHT GAUGE MODEL BHG-3 (CBC)
‘PIE’ Brand Buffer Height Gauge, Model BHG‑3 (CBC) model consists of foldable track base and vertical column with a measuring scale & pointer. This column has a verticality bubble and is foldable for compactness and ease in storing and transportation.
Special Features: –
- Measuring Range 900 to 1140 mm.
- Accuracy of gauge is ±1.0 mm
- Supplied in elegantly finished storing & transportation box with carrying handle.
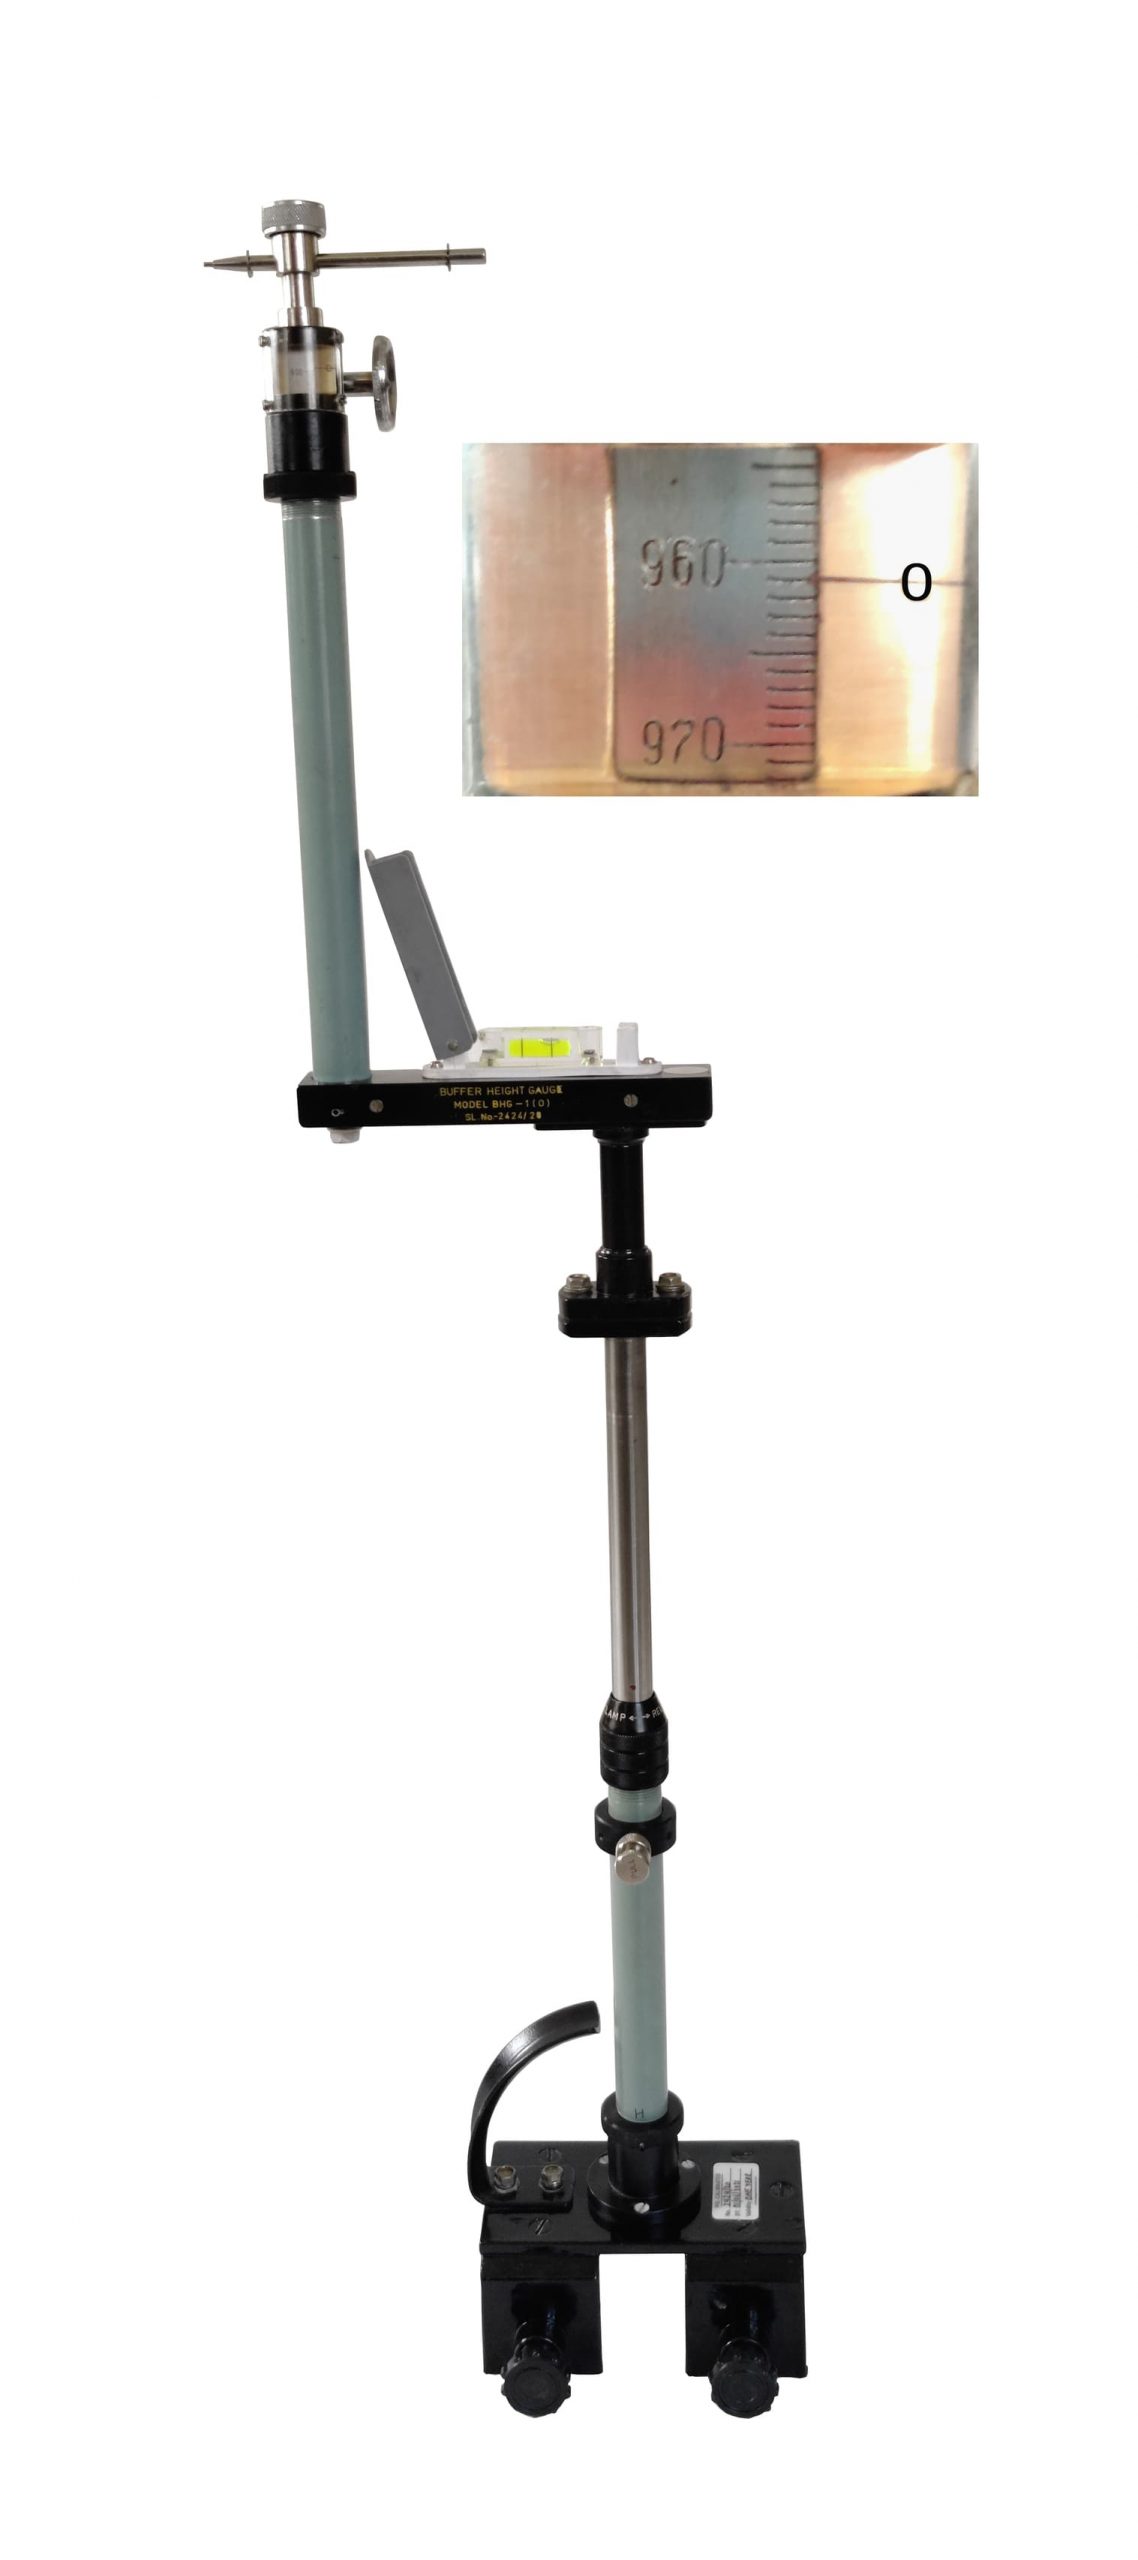
BUFFER HEIGHT MEASURING GAUGE MODEL BHG-1 (O).
‘PIE’ Brand Buffer Height Gauge, Model BHG‑1 (O). This model is used for measurement of side buffers height. The instrument is clamped on the rails and heights of two buffers are measured separately. The measuring unit fitted at the offset to cover the difference of horizontal distance between the rail & the buffer. Accuracy of gauge is ± 1.0 mm. Supplied in elegantly finished storing & transportation box with carrying handle. Measuring Range 900 to 1140 mm.
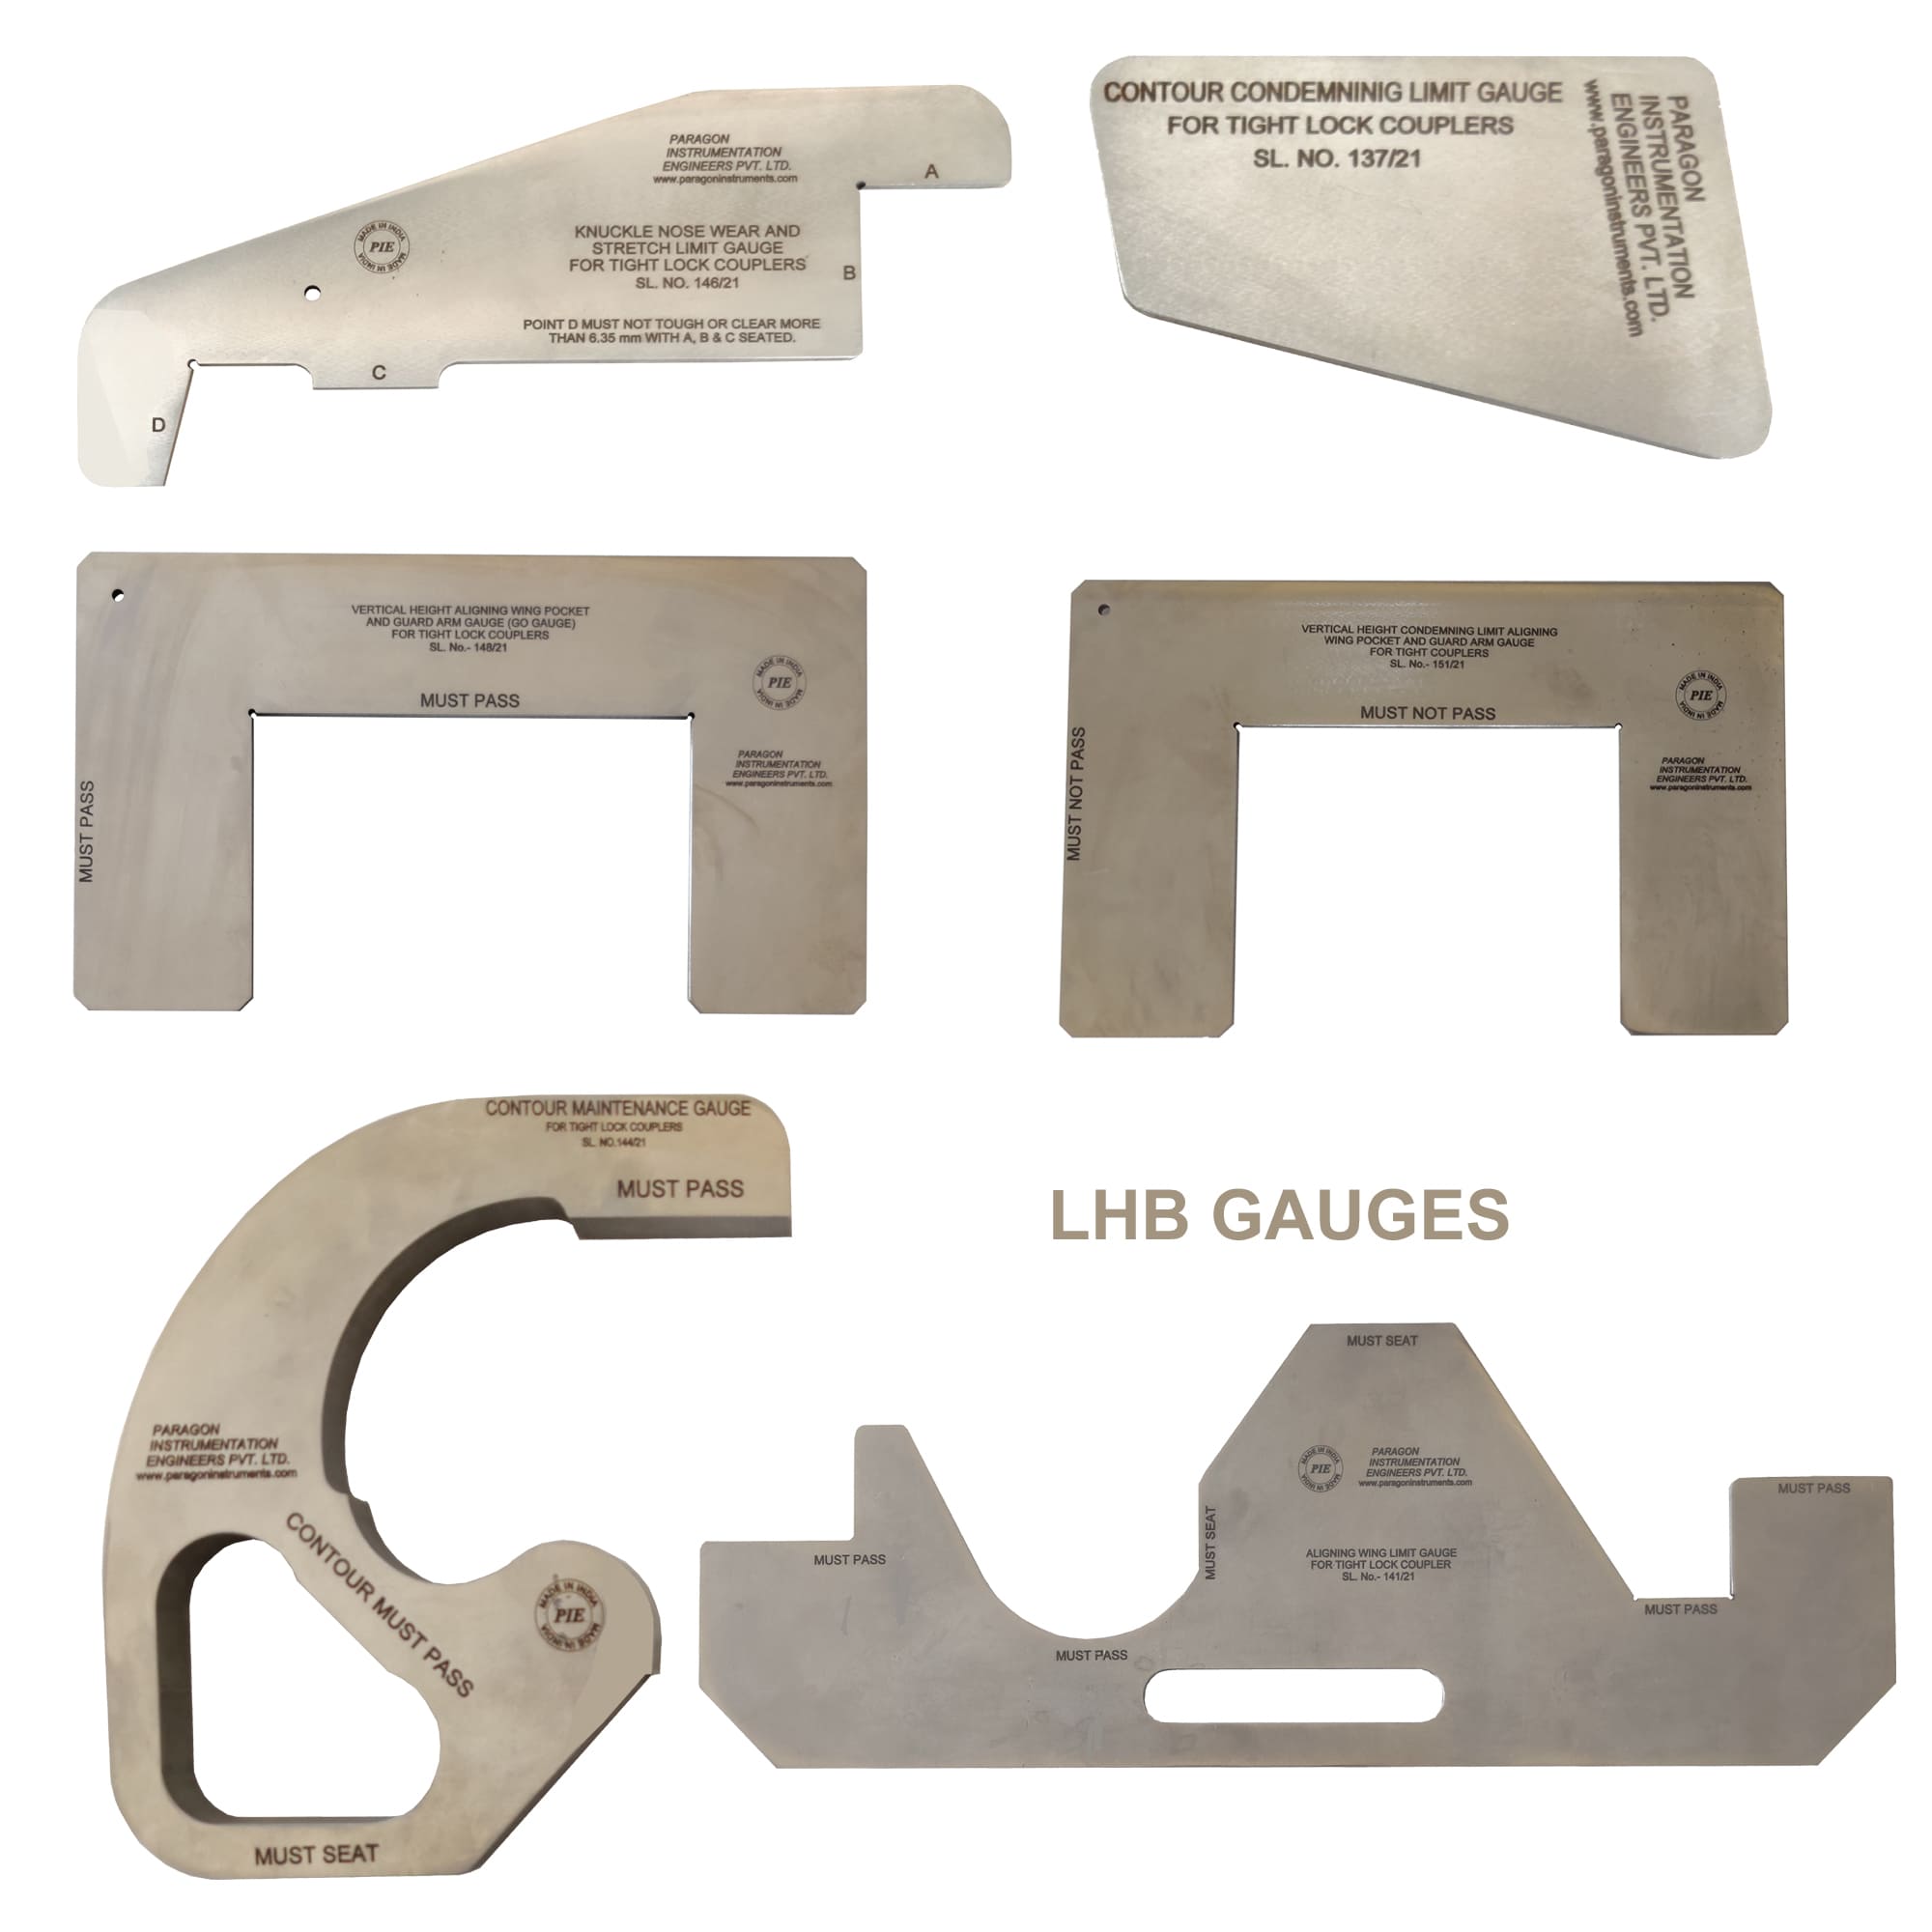
GAUGES FOR CHECKING OF AAR ‘H’ TYPE CENTER BUFFER COUPLER OF LHB COACHES.
‘PIE’ make Set of 06 gauges for checking of AAR ‘H’ type Center Buffer Coupler of LHB Coaches. All gauges are made of hard stainless steel and hardness 50 HRC. Supplied in carrying bag.
01 Set consisting of followings gauges: –
- ‘PIE’ make Contour Maintenance Gauge. (Knuckle Profile Gauge) for checking CBC-“H”- type coupler (APTA Drawing/ Gauge No.-31000).
- ‘PIE’ make Aligning Wing Limit Gauge for checking CBC-“H” Type coupler (APTA Drawing/ Gauge No.-32600).
- ‘PIE’ make Contour Condemning Limit Gauge (Jaw- Gap Gauge) for checking CBC- “H” Type coupler (APTA Drawing/ Gauge No.-34100-1).
- ‘PIE’ make Knuckle Nose Wear and Stretch Limit Gauge for checking CBC-“H”- Type coupler (APTA Drawing/ Gauge No.-34100-2A).
- ‘PIE’ make Vertical Height Aligning Wing Pocket & Guard Arm Gauge (GO GAUGE-Must-Pass) for checking CBC-“H”- Type coupler (APTA Drawing/ Gauge No.-34101-4).
- ‘PIE’ make Vertical Height Condemning Limit Aligning Wing Pocket & Guard Arm Gauge (NO-GO GAUGE must not pass) for checking CBC-“H” Type coupler (APTA Drawing/ Gauge No.-44250-5).
THE GAUGES QUOTED ABOVE WILL BE SUPPLIED WITH ‘PIE’ CALIBRATION CERTIFICATE TRACEABLE TO NATIONAL STANDARD/NPL STANDARD NOT OF ANY OTHER AGENCY. OUR MASTERS ARE CALIBRATED BY NABL APPROVED LABS.

