Download Brochure
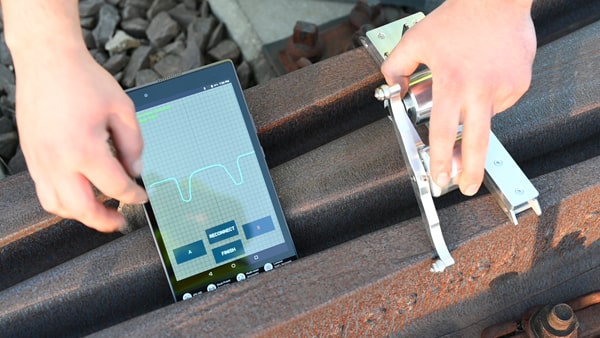
Rail Profile Gauge Cum Recorder – Basic Version Model RPCS Basic 2.0 With a “Frog” attachment the RPCS device is capable of measuring the cross-section profile of the frogs at turnouts.
Rail Profile Gauge Cum Recorder – with Frog (Point) Measurement attachment along with ruggedized Android Tablet.
The application fields of RPCS: –
- Checking the manufactured rail profile at takeover.
- Periodic checking the rail wear for planning the maintenance.
- Measuring the eliminated material and measuring the profile during grinding activity (FWB Machine).
The portable RPCS is a very effective equipment for measuring the rail profile because of its light weight, simple and quick operability. The magnetic measuring base and the telescopic support leg provide the stability of the adequate measuring position. The mechanical scanning roller scans the real rail profile, therefore the contamination on the rail surface does not distort the measurement. The profile measurement can be done on most of the rail types e.g. on Vignol and Phoenix rails as well. The double measuring bar provides the possibility to measure the rails with extreme wear, rails with crinkling and the inclination of the rail can be calculated by measuring the bottom surface of the rail head. The geometric preparation of the bar was done by taking into consideration ergonomic examinations in order to decrease the number of the unnecessary move of the hands.
The handheld computer connects to the RPCS via Bluetooth connection. Shock and resistant and water transport box provide the safe transportation of the device and its accessories. The changeable battery ensures the continuous operation over several shifts.
The functions of the measuring program: –
- Recording the identification data of the measurement.
- The instant display of the measuring results.
- Calculation of wear features from the measured profile.
- Comparison of two measurements.
- Numeric display of differences.
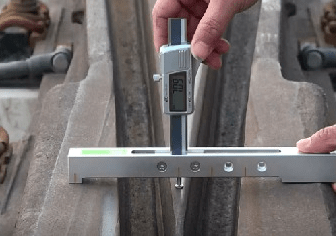
With a “Frog” attachment the RPCS device is capable of measuring the cross-section profile of the frogs at turnouts.
The following parameters can be measured and calculated with this option:
- The height wear of the switch blade.
- The width of the flangeway
- The depth of the flangeway
Technical Specification: –
| Resolution | 5 µm |
| Accuracy in lab (polished rail w/o rust & dust) | ±0.01 mm |
| Accuracy | ±20 µm |
| Repeatability | ±10 µm |
| Time demand of one measurement | cc. 8 seconds |
| Measuring range X | 320 mm |
| Measuring range Y | 60 mm |
| Operating temperature | -20°C… +55ºC |
| Supply | 1 X Li-ion rechargeable battery (18650 type) |
| Operating time | Min. 8 hours / 1000 measurements |
| Insulation resistance | 2 Mohm/500 V (DC) |
| Dust and water resistance | IP54 |
| Communication way | Bluetooth |
| Dimensions | 125x150x150mm |
| Overall system weight | ˂ 8 Kgs |


